
The BC Archives is currently finishing up a project to arrange, describe and digitize a collection of photographic holdings from Ernest Crocker, a notable nineteenth century photographer. Part of this effort has involved some conservation work to repair some of the elements of these collections that have not made it through the ravages of time in one piece. In this particular example, the image identified as J-02623, there were a great many pieces. The following is a description of how it was repaired.
Background and terminology
Glass plates were used as a support for photographic negatives early on in the history of photography and continued to be used well into the first half of the twentieth century. The negative is composed of two layers: the glass support and the photographic emulsion that holds the image (Fig 2). In the case of this example, the emulsion layer was made from gelatin.
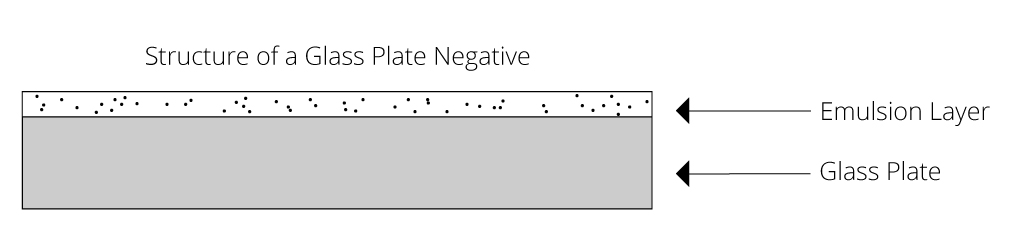
Figure 3. Diagram of the physical structure of a glass-plate negative.
Condition issues
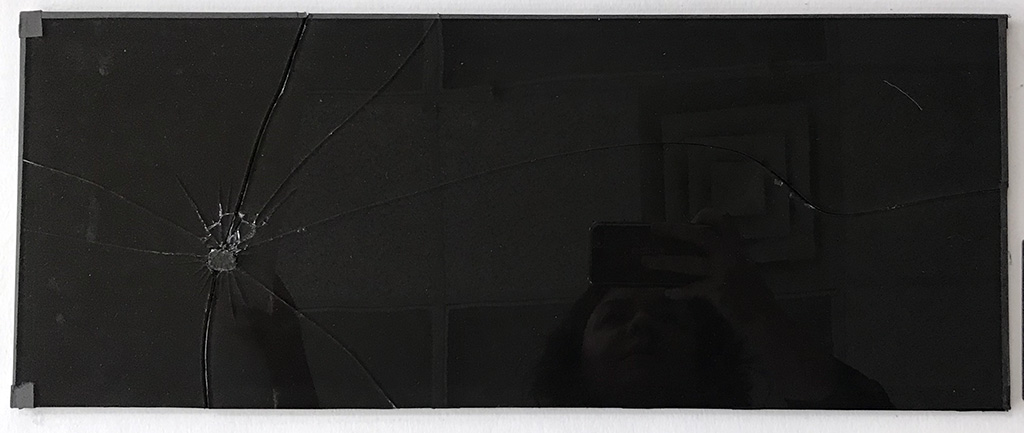
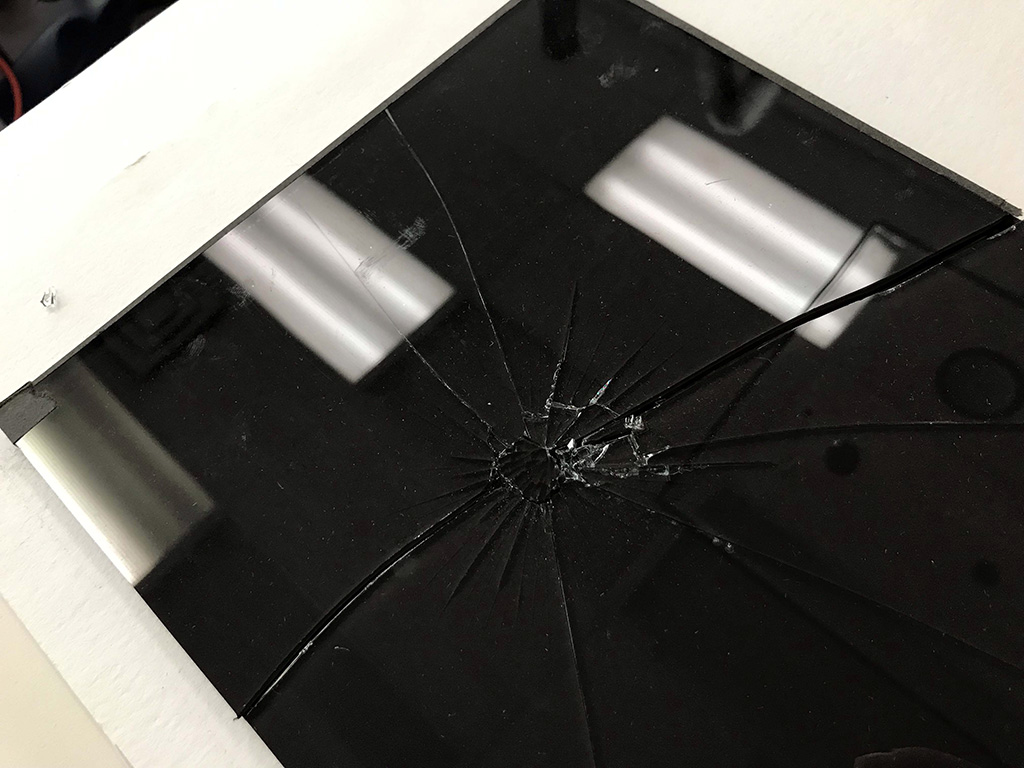
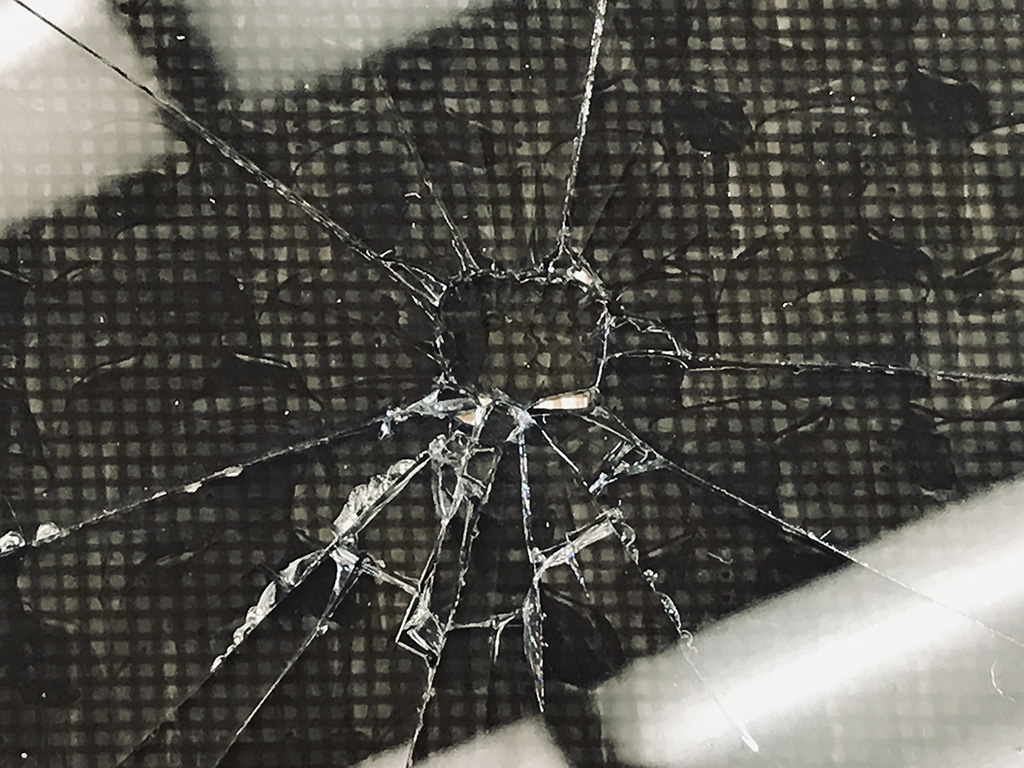
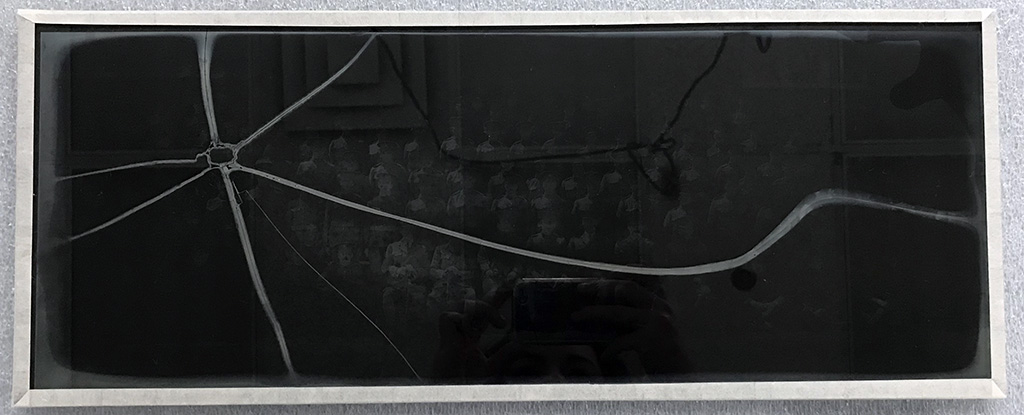
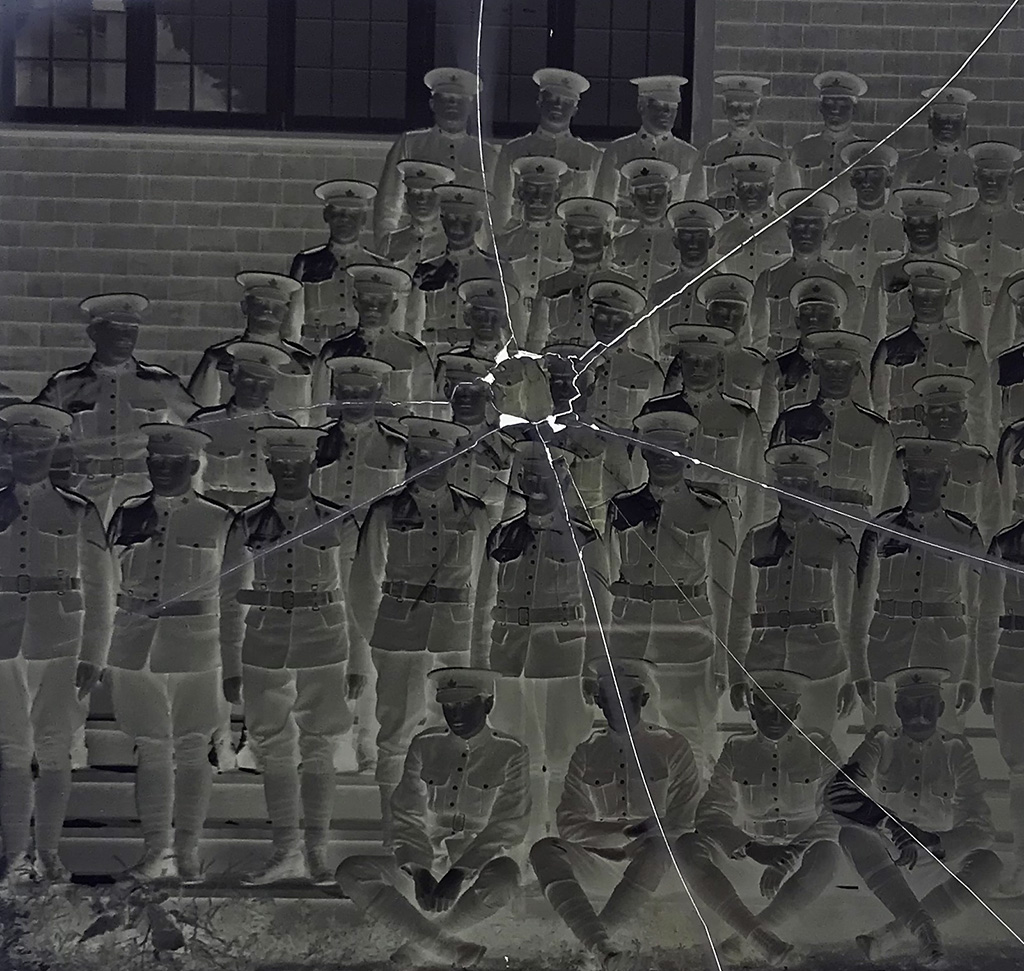
When J-02623 arrived in the conservation lab, it was in many pieces and was resting on a second, intact plate. The fractures radiated from a central point near the upper right corner, suggesting that the negative had been struck by something blunt at some point in its history. In some of the areas around the cracks, the glass had been reduced to dust, which meant that there would likely be small losses once the dust was cleared. Its fragmented and fragile condition meant that it could not be removed from the supporting negative underneath it, which meant that the archivist could not see or identify either image and absolutely couldn’t digitize them.
These condition issues posed a few interesting problems in terms of developing a conservation treatment:
1. Broken plate cannot be stabilized as it is
Cracks in glass plate negatives are not uncommon. In many instances, simple solutions such as custom storage enclosures or pressure mounts are sufficient for long-term stability. Pressure mounts—two new pieces of glass put on either side of the broken original and taped together—were used on several other broken plates within this collection. The benefit of this method is that the new glass provides the necessary support for the plate to be handled again and the treatment is completely reversible, allowing for reconsideration of treatment alternatives in the future if desired. In the case of J-02623, however, this would not be feasible—the negative was too fragmented and would not be adequately supported by a pressure mount alone.
2. Broken plate cannot be moved as one piece
Before methods for consolidation and long-term storage could be considered, the issue of simply removing the broken plate from the intact plate beneath it had to be addressed. As previously mentioned, areas around the cracks had disintegrated into dust. This meant that sliding the broken negative off of the supporting plate and onto a new piece of support glass would be impossible. Some of this sharp, glass dust was likely to be under the broken shards of the negative. If sliding was attempted, the glass dust would act as sandpaper, abrading the delicate emulsion on the underside of the broken negative, leading to partial losses of the image. It would also likely scratch the glass side of the other negative as well.
3. Reassembly after any disassembly would be very tricky
If the broken pieces couldn’t be slid onto a new support or work surface, they would have to be lifted. But this solution posed its own problems: how do you replace so many tiny pieces back in proper alignment once they’ve been disassembled?
4. How to stabilize for the long-term
Once a plan to remove and reassemble the broken plate is achieved, how do you stabilize it for gentle handling and digitization? If a pressure-mount system is not enough, the only other option is to adhere all of the shards back together; however, this is easier said than done. How do you apply adhesive to glass shards without it oozing out around the edges? What adhesive will provide a strong enough bond while also having good aging properties as well as being reversible/adjustable?
Treatment
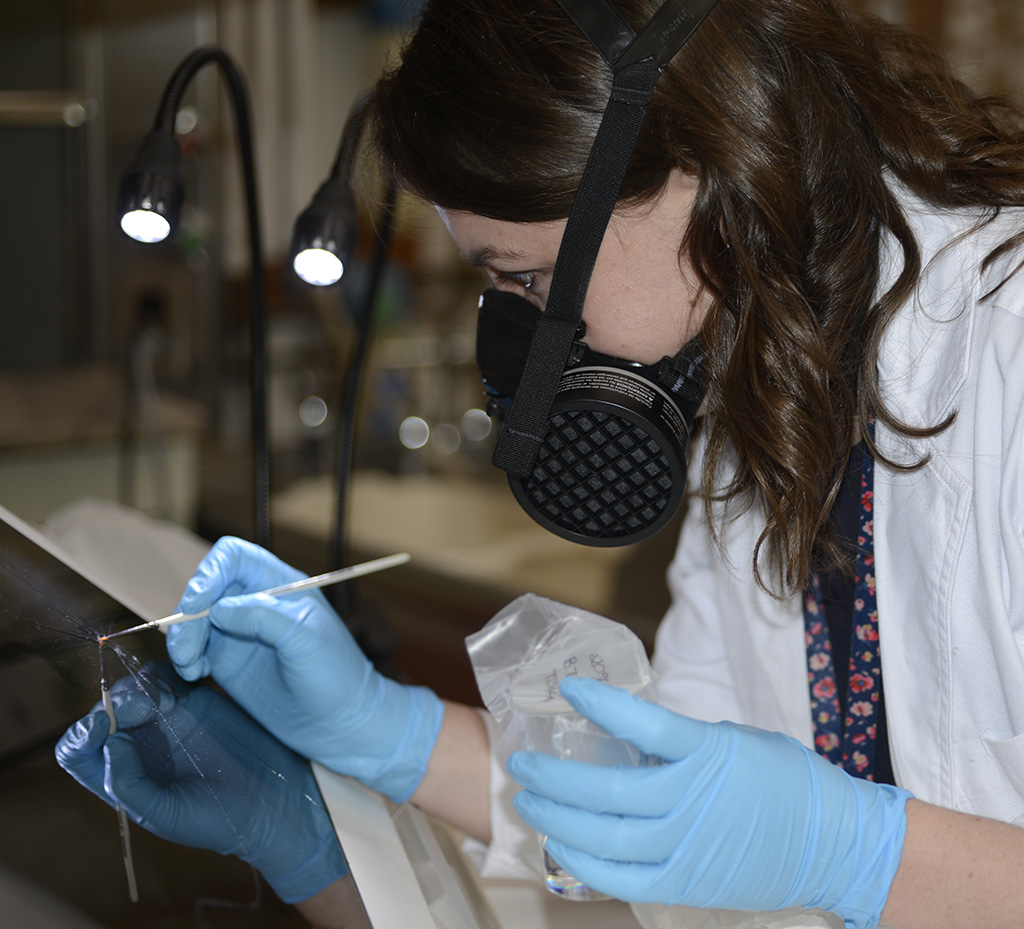
Figure 6. Paper conservator Lauren Buttle applying adhesive to glass side of J-02623 using Silpat® method. A respirator mask was required for this treatment because of the use of solvents.
A carefully considered treatment plan was required to answer so many questions.
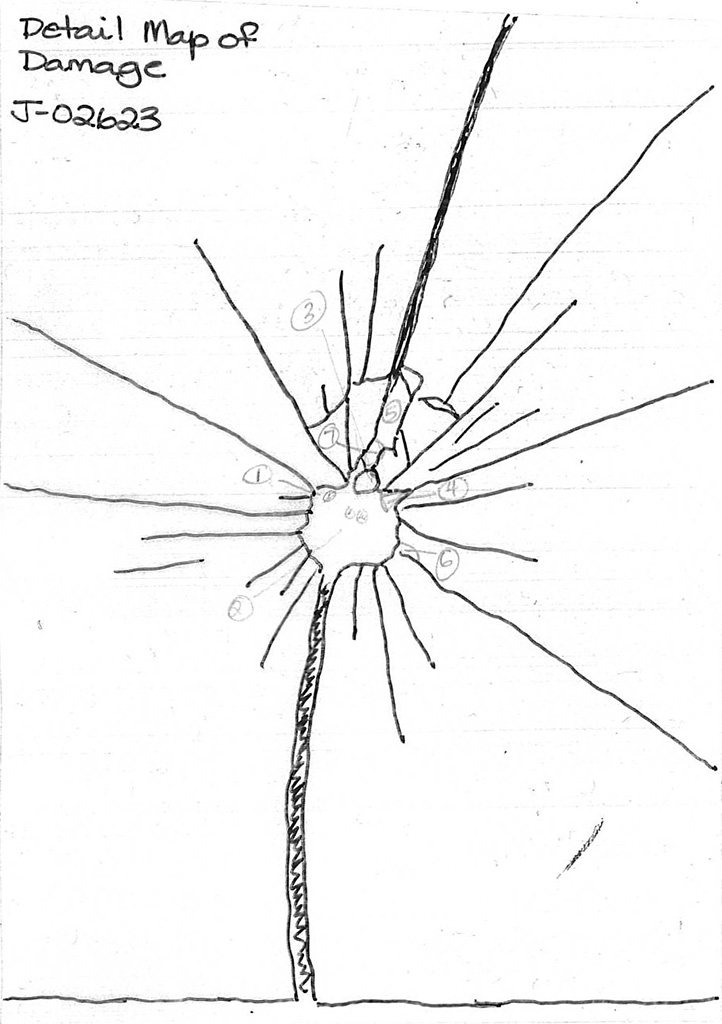
To achieve the first task of moving the broken plate to a new working surface, the damage was first mapped (traced) onto a clear sheet of plastic with permanent marker and photocopied onto paper. This map was used as the basis for recording the location of each of the tiny shards that would have to be replaced afterwards. Tiny shards that were big enough to carry part of the emulsion were removed one-by-one, placed in a numbered bag and their shape and location was noted on the map (Figs. 4 and 5).
Before the shards were reassembled, the edges of each one were swabbed with acetone to clean away any dirt or oil that might impede adhesion. The shards were reassembled, emulsion-side down, on an inclined surface against a Silpat® mat (a reusable silicone-covered textile designed for baking). This mat provides a non-stick surface that is not completely flat. The texture in the textile provides a series of small bumps that raise the glass slightly off of the rest of the surface. The adhesive is delivered to the cracks on the glass side and capillary action draws the adhesive through the crack. Because there is no consistent contact with a flat surface on the emulsion side, the capillary action stops at the emulsion side, keeping the edges of the cracks on that side nice and neat. All of the pieces were assembled dry first. After all pieces were aligned, adhesive was administered.
After the adhesive in the cracks was dry, the glass-side surface was cleaned gently with solvents to remove any adhesive residue from the edge of the cracks.
The adhesive used for this repair was Acryloid B-72, a non-proprietary acrylic adhesive with known aging properties and good long-term stability. Acryloid B-72 can be dissolved in many different organic solvents. In this case, toluene was used, because it has a relatively slower drying time, which allows more time for the solvated adhesive to flow into the cracks before drying. Various concentrations were tested until full penetration of a crack in a test piece of glass was achieved (Fig. 7).
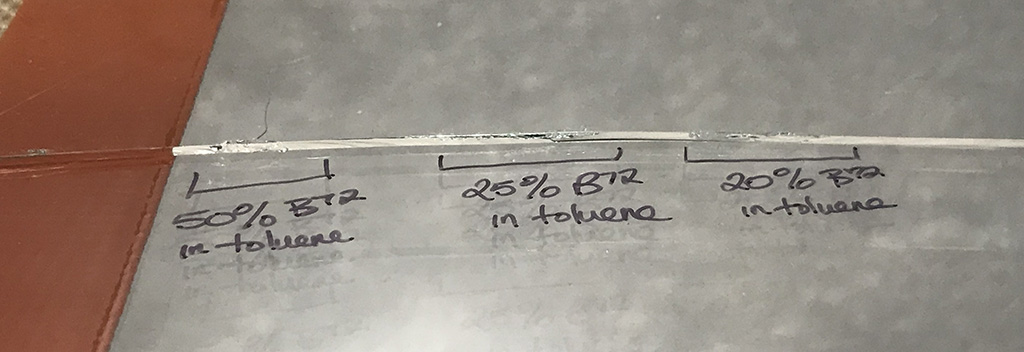
Figure 7. Test glass with different concentrations of Acryloid B-72 in toluene applied to a crack. When light is shown over the crack, the areas where the adhesive has been drawn in begin to disappear.
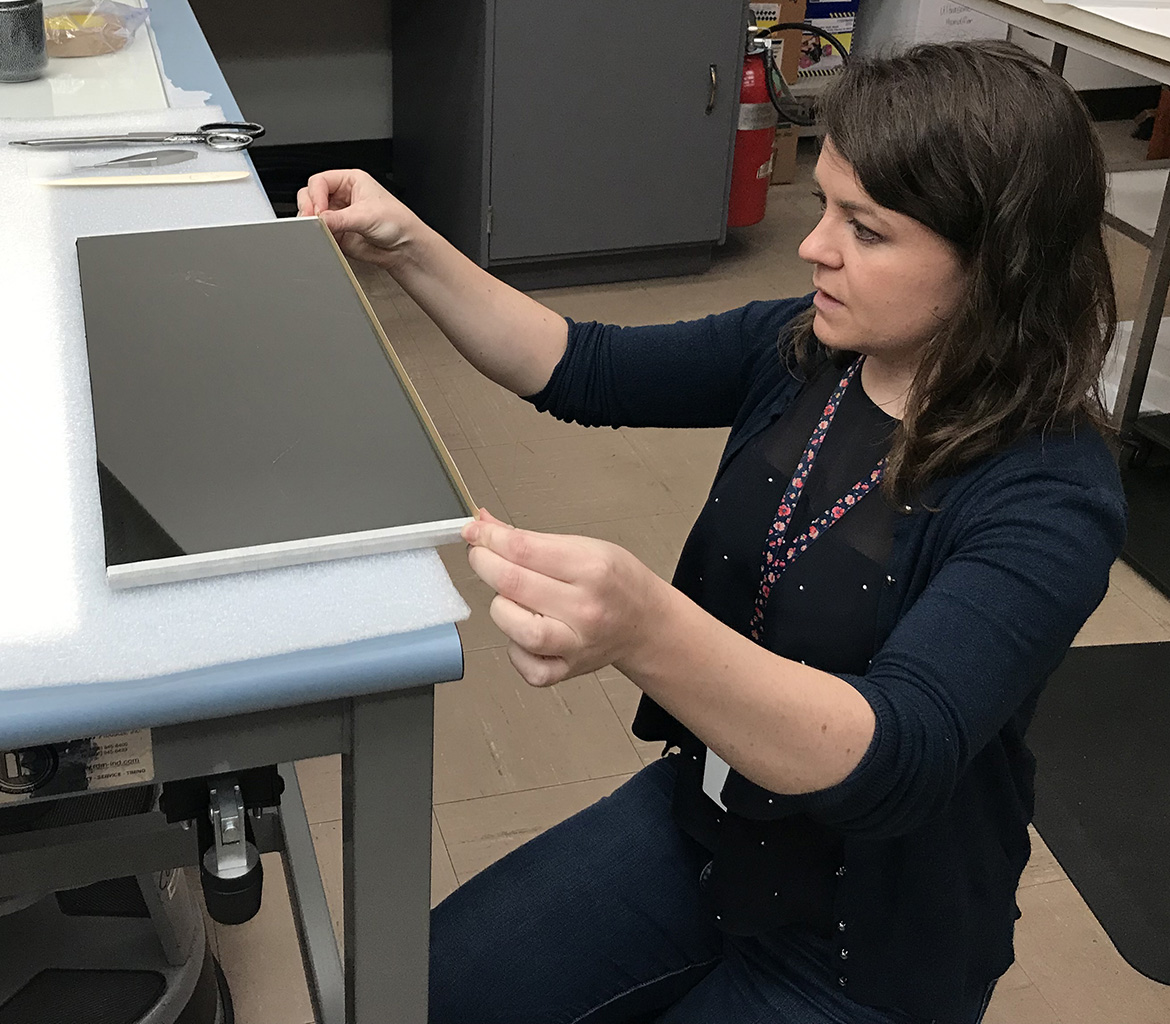
After all the pieces had been assembled and adhered in place, the plate could be lifted and handled gently. But due to the larger size of the plate and the amount of cracking, additional support would be needed for long-term care and access. Also, there were small losses in areas in the center of the cracking, which left jagged edges exposed. For these two reasons, it was decided that a pressuremount would be the best way to protect the plate and the patron.
Two new sheets of glass, cut to the same dimensions as the negative, were cleaned and placed on either side of the repaired plate. All four edges were taped to seal the package and allow for easy handling. The plate will be transferred to a member of our Preservation team for digitization with the rest of the collection.
For more information on this collection, see the Ernest Crocker Fonds (PR-1348) on the BC Archives website.
Acknowledgements
The techniques for repair discussed in this blog were based on the methods conveyed by Katherine Whitman, conservator of photographs for the Art Gallery of Ontario (AGO) at a workshop hosted by the AGO in October 2018. My attendance at that workshop was generously sponsored by the Koerner Conservation Initiatives Fund through the AGO and the Royal BC Museum. I am also grateful for the ongoing communications with Katherine Whitman in devising a treatment for this plate.
Thank you to Joel Blaicher, exhibits fabricator for the Royal BC Museum, for building the support that was used in this treatment. Thanks also to Rob Anderson, lighting and AV specialist for the Royal BC Museum, for his assistance in creating a time-lapse video of this treatment.